Description
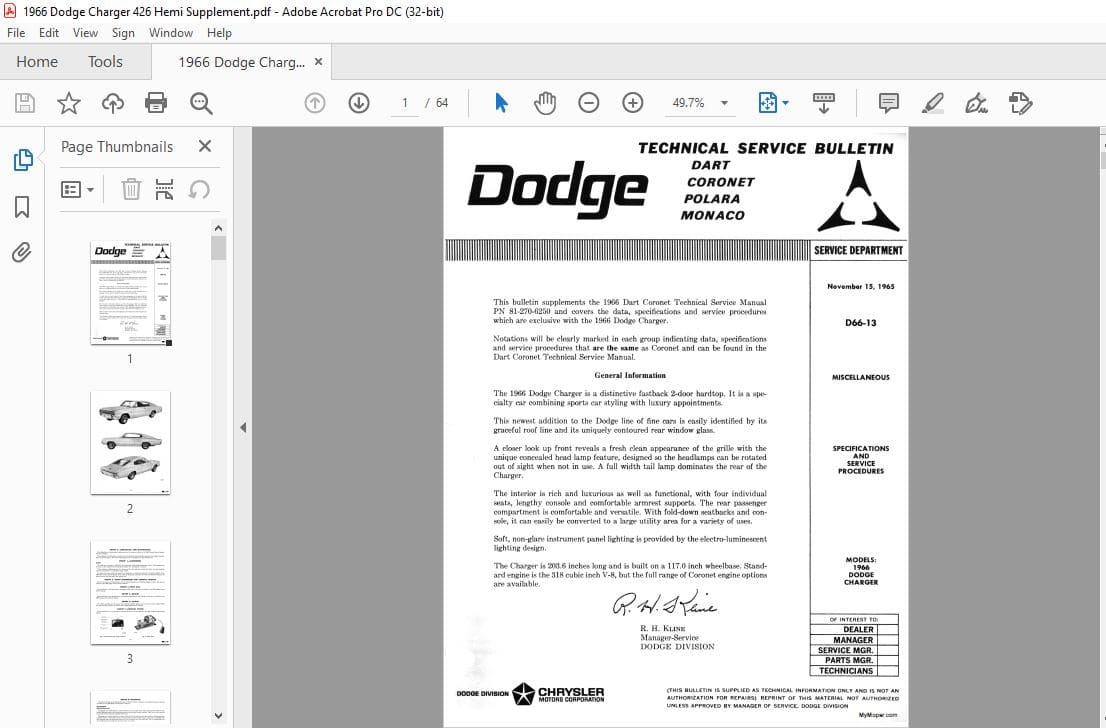
1966 Dodge Charger 426 Hemi Supplement Manual – PDF DOWNLOAD
- The fuel, temperature and oil pressure gauges operate on the constant applied voltage principle through a voltage limiter integral with the fuel gauge. Test and service diagnosis are the same as those outlined in the 1966 Monaco- Polara Service Manual. All gauge wires are connected directly to the respective gauges instead of being connected to a multiple connector and routed through a printed circuit board.
- Voltage limiter The voltage limiter can be tested in the vehicle or with the instrument cluster removed. To quickly test the voltage limiter in the vehicle, connect one lead of a voltmeter or test light to the temperature sending unit and the other lead to a good ground. Leave the sending unit lead wire attached to the sending unit. Turn the ignition switch to the “ON” position. A fluctuating voltmeter or a flashing light indicates the voltage limiter is operating.
- To test the voltage limiter out of the vehicle, connect a jumper wire from the positive post of a 12 volt test battery, to the “I” terminal of the fuel gauge. Connect another jumper wire from the battery negative terminal to the instrument cluster housing. Connect the negative lead of a voltmeter to the battery negative terminal. Touch the positive lead of the voltmeter to the “I” terminal of the fuel gauge. A reading of 12 volts should be shown on the voltmeter. Move the positive lead of the voltmeter to the “A” terminal of the fuel gauge.
- A fluctuating reading between 0 and 7 volts should be shown on the voltmeter. The same reading should be shown at the “S” terminal of the fuel gauge. Any other readings indicate the voltage limiter is not functioning and the fuel gauge should be replaced.
Table Of Contents:
1966 Dodge Charger 426 Hemi Supplement Manual – PDF DOWNLOAD
INTERIOR Bulb Number
Air Conditioning Controls . . . . . . . . . . . . . . . . . . . . . . . EL
Clock. . . . . . . . . . . . . . . . . . . . . . . . . . . . . . . . . . . . . . . . . . . . . . . . . . . . . . . . . . . . . . . . . . . . . . . . . . . . . . . . . EL
Dome and/or “C” Pillar. . . . . . . . . . . . . . . . . . . . . . . . . . . . . . . . . . . . . . . . . . . . . 1004
Door and/or Pocket . . . . . . . . . . . . . . . . . . . . . . . . . . . . . . . . . . . . . . . . . . . . . . . . . . . . . . . . . . . . . . . . . . . . 90
Emergency Flasher Indicator. . . . . . . . . . . . . . . . . . . . . . . . . . . . . . . . . . 57
Gear Selector in Console. . . . . . . . . . . . . . . . . . . . . . . . . . . . . . . . . . . . . . . . . . . . . . . . . .
Glove Compartment. . . . . . . . . . . . . . . . . . . . . . . . . . . . . . . . . . . . . . . .
Hand Brake Indicator. . . . . . . . . . . . . . . . . . . . . . . . . . . . . . . . . . . . . . . . . . . . . . . .
Heater Control. . . . . . . . . . . . . . . . . . . . . . . . . . . . . . . . . . . . . . . . . . . .
High Beam Indicator.. . . . . . . . . . . . . . . . . . . . . . . . . . . . . . . . . . . . . . . . . . . . . . . . . . . . . . . . . . . . . . . . . .
Map Lamp . . . . . . . . . . . . . . . . . . . . . . . . . . . . . . . . . . . . . . . . . . . . . . . . . . . 90
Radio . . . . . . . . . . . . . . . . . . . . . . . . . . . . . . . . . . . . . . . . . . . . . . . . . . . . . . . . . . . . . . . . . . . . . . . . . . . . . . . . . EL
Rotating Headlight Indicator. . . . . . . . . . . . . . . . . . . . . . . . . . . . . . . . . . . . . . . . . . . . . . . . . . . . . . . . . . . . 57
Speedometer and Instrument Cluster. . . . . . . . . . . . . . . . . . . . . . . . . . . . . . . . . . . EL
Tachometer . . . . . . . . . . . . . . . . . . . . . . . . . . . . . . . . . . . . . . . . . . . . . . . . . . . . . . . . . . . . . . . . . . . . . . . . . . . EL
Trunk and/or Under Hood Lamp. . . . . . . . . . . . . . . . . . . . . . . . . . . . . . . . . . . . . . . . . . . . . . . . 1004
Turn Signal Indicator. . . . . . . . . . . . . . . . . . . . . . . . . . . . . . . . . . . . . . . . . . . . . . . . . . . . . . . . . 57
EXTERIOR
Back u p . . . . . . . . . . . . . . . . . . . . . . . . . . . . . . . . . . . . . . . . . . . . . . . . . . . . . . . . . . . . . . . . 1141
Headlights
Sealed Beam-High . . . . . . . . . . . . . . . . . . . . . . . . . . . . . . . . . . . . . . . . . . . . . . . . . . . . . . . . . . . . . . . . . . 4001
Sealed Beam-Low . . . . . . . . . . . . . . . . . . . . . . . . . . . . . . . . . . . . . . . . . . . . . . . . . . 4002
License. . . . . . . . . . . . . . . . . . . . . . . . . . . . . . . . . . . . . . . . . . . . . . . . . . . . . . . . 67
Park and Turn Signal.. . . . . . . . . . . . . . . . . . . . . . . . . . . . . . . . . . . . . . . . . . . . . . . . . . . . . . . . . . . . . . . . . . 1034 NA
PLEASE NOTE:
- This is the same manual used by the dealers to diagnose and troubleshoot your vehicle
- You will be directed to the download page as soon as the purchase is completed. The whole payment and downloading process will take anywhere between 2-5 minutes
This factory Mopar Dodge Service Manual Download will give you complete step-by-step information on repair, servicing, and preventative maintenance for your Dodge. This Dodge FSM (Factory Service Manual) is highly detailed with photos and illustrations to help guide you through every repair and troubleshooting procedure. This is the Dodge OEM (Original Equipment Manufacturer) manual from Mopar so it contains all you need to know to keep your Dodge working right and is the only service repair manual you will need. All pages are printable, so print what you need and take it with you into the garage or workshop. Save money by doing your own repairs!